
Crispy Golden Onion Rings Recipe: A Step-by-Step Guide to Perfectly Fried Delights
Introduction
Crispy golden onion rings are a beloved snack that transcends culinary boundaries, offering a delightful crunch and robust flavor that appeals to food enthusiasts of all ages. Whether served as a classic side dish alongside juicy burgers or enjoyed as a stand-alone appetizer accompanied by your favorite dipping sauce, onion rings have earned their place as a staple in both casual diners and upscale restaurants. The allure of these fried delights lies not only in their satisfying crunch but also in the warmth of homemade preparation, where each bite delivers a perfect balance of sweetness and savory goodness. This article will guide you through the process of crafting your own crispy onion rings at home, emphasizing the joy and satisfaction that come from creating this iconic dish from scratch.
The Allure of Homemade Onion Rings
The difference between homemade onion rings and their store-bought counterparts is striking. While many frozen options promise convenience, they often fail to deliver the fresh taste and texture that only comes from preparing food yourself. Homemade onion rings provide a world of flavor and customization that pre-packaged versions simply cannot replicate. When you fry your own onion rings, you control every aspect of the process, from the selection of ingredients to the cooking method.
Freshly made onion rings allow for experimentation; you can adjust the thickness of the rings, choose your preferred batter, and add spices that cater to your taste. The satisfaction of achieving the perfect golden color and an irresistible crunch is unparalleled. Moreover, you get to savor the aroma of onions frying in your kitchen, a sensory experience that elevates the cooking process. By opting for homemade, you not only create a dish that is healthier—free from preservatives and additives—but also one that reflects your culinary skills and creativity.
Ingredients Overview
To embark on the journey of making crispy golden onion rings, you will need a few fundamental ingredients that work together to create the perfect texture and flavor profile. Here’s a breakdown of each ingredient and its significance:
– Yellow onions: These are the ideal choice for onion rings due to their natural sweetness and robust flavor. Their crunchy texture holds up well during frying, making them perfect for achieving that satisfying bite.
– Buttermilk: This ingredient is essential for tenderness and flavor enhancement. Soaking the onion rings in buttermilk not only adds moisture but also helps to tenderize the onions, resulting in a melt-in-your-mouth experience.
– All-purpose flour and Panko breadcrumbs: A combination of these two types of breading is crucial for achieving the desired crunch. While all-purpose flour provides a base layer that adheres well to the onions, Panko breadcrumbs add an extra layer of crispiness that elevates the texture of the final product.
– Spices: Enhancing the flavor of onion rings is easy with the addition of spices. Garlic powder brings a savory depth, smoked paprika adds a hint of smokiness, and cayenne pepper introduces a subtle kick that balances the sweetness of the onions.
Preparation Steps
Creating the perfect crispy golden onion rings involves several key preparation steps. Each stage is important for achieving the desired result, so follow along carefully to ensure your onion rings turn out just right.
Preparing the Onions
The first step in preparing your onion rings is selecting the right onions. Look for firm yellow onions with smooth skin—these are typically the sweetest and most flavorful. Start by peeling the onions and slicing them into rings. Aim for uniform thickness, about ¼ to ½ inch, to ensure even cooking. Thicker rings will take longer to cook, while thinner ones may become overly crispy.
Once sliced, gently separate the rings, taking care not to break them. You can reserve the smaller inner pieces for other recipes or snacks. Properly prepared onion rings will result in a more visually appealing dish and a consistent texture throughout.
Soaking in Buttermilk
After preparing the onions, the next step is to soak them in buttermilk. This crucial process serves two purposes: it tenderizes the onion slices and infuses them with flavor. The acidity in buttermilk breaks down the onion’s fibers, resulting in a softer texture that contrasts beautifully with the crispy coating.
For optimal results, soak the onion rings in buttermilk for at least 30 minutes, or up to a few hours if time allows. If you don’t have buttermilk on hand, you can easily create a substitute by mixing regular milk with a tablespoon of vinegar or lemon juice. Allow the mixture to sit for about 5-10 minutes to achieve a similar acidity level.
Creating the Breading Station
While the onions soak, it’s time to set up your breading station. This involves organizing your ingredients to make the coating process smooth and efficient. You’ll need three shallow dishes: one for all-purpose flour, one for the buttermilk-soaked onions, and one for the breadcrumb mixture.
In the first dish, add a generous amount of all-purpose flour and season it with salt and pepper to taste. In the second dish, place the buttermilk-soaked onion rings, allowing excess buttermilk to drip off before moving on to the final dish. In the third dish, combine Panko breadcrumbs with your chosen spices—garlic powder, smoked paprika, and cayenne pepper. This setup will streamline the breading process, ensuring each onion ring is evenly coated for that perfect crunch.
Now that you’ve prepared and organized your ingredients, you’re ready to continue with the frying process, which will bring your crispy golden onion rings to life. Stay tuned for the next steps, where we will cover the frying technique and tips for achieving the perfect crispy finish.
{{image_2}}
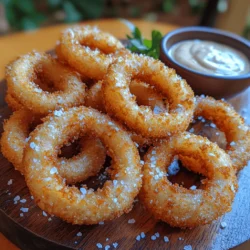
Creating the perfect crispy golden onion rings involves a careful selection of ingredients and techniques, particularly in the breading station. This section will guide you through the essential steps, from coating your onion rings to frying them to perfection, and finally, serving them in an appealing manner.
The Importance of the Breading Station
The breading station is where the magic begins. It consists of three main components: flour, eggs, and breadcrumbs. Each ingredient plays a vital role in achieving that desired crunch and flavor.
Flour
The flour acts as the first layer of the coating. It helps the egg adhere to the onion rings, creating a solid base for the subsequent layers. Using all-purpose flour is standard, but you can also experiment with seasoned flour to add extra flavor.
Eggs
Eggs serve as the binding agent. They give the coating its richness and provide moisture, helping the breadcrumbs stick firmly to the onion rings. Beating the eggs until frothy can add air, resulting in a lighter coating.
Breadcrumbs
Breadcrumbs are the star of the show when it comes to crunch. For onion rings, panko breadcrumbs are often recommended due to their larger size and lighter texture, which contributes to a crispier finish. You can also use seasoned breadcrumbs for added flavor. The combination of these three ingredients creates a deliciously crunchy exterior that contrasts beautifully with the sweet, soft onion inside.
Coating the Onion Rings
Now that your breading station is set up, it’s time to coat the onion rings. Follow these steps for a thorough and even coating:
1. Dredge in Flour: Take an onion ring and dip it into the flour, ensuring it’s fully coated. Shake off any excess flour. This initial layer is crucial, as it prepares the onion for the moisture of the egg.
2. Dip in Eggs: Next, dip the floured onion ring into the beaten eggs, making sure it’s completely covered. The egg will act as the glue, allowing the breadcrumbs to adhere properly.
3. Coat with Breadcrumbs: Finally, roll the egg-coated onion ring in the breadcrumbs. Press gently to ensure an even layer, ensuring all surfaces are covered. For an extra crispy texture, you can repeat the process of dipping in egg and coating with breadcrumbs—this is known as double-dipping. It creates a thicker, crunchier layer that enhances the overall texture of the finished product.
Frying Techniques
Frying onion rings requires attention to detail, especially regarding the oil used and the frying process itself.
Choosing the Right Oil
Select an oil with a high smoke point for frying, such as canola, vegetable, or peanut oil. These oils can withstand high temperatures without breaking down, leading to better frying results.
Importance of Oil Temperature
The oil temperature is critical for achieving crispy onion rings. Ideally, you want the oil to be around 350°F to 375°F (175°C to 190°C). If the oil is too cool, the onion rings will absorb too much oil and become greasy. Conversely, if it’s too hot, they can burn before cooking through.
To test the oil temperature, you can use a thermometer or drop a small piece of bread into the oil. If it browns in about 60 seconds, the oil is ready for frying.
Tips for Frying in Batches
Fry the onion rings in small batches to maintain the oil temperature. Overcrowding the pan can lower the oil temperature, leading to soggy rings. Frying in batches also allows for even cooking and prevents the rings from sticking together.
The Perfect Fry
When frying onion rings, it’s essential to watch for visual cues to ensure they’re cooked perfectly. Here’s what to look for:
– Color: The onion rings should turn a beautiful golden brown. This color indicates that they are fully cooked and will have that satisfying crunch when bitten into.
– Texture: The coating should be crispy and firm to the touch. You can test a few by gently pressing them; they should feel hard and not give way easily.
After frying, it’s crucial to drain excess oil to prevent sogginess. Place the fried onion rings on a plate lined with paper towels. This will absorb any remaining oil, keeping your onion rings crispy.
Serving Suggestions
Crispy onion rings are delicious on their own, but they can be elevated further with the right serving suggestions.
Ideal Dipping Sauces
Pair your onion rings with a variety of dipping sauces. Classic options include:
– Ranch Dressing: The cool creaminess complements the crispy texture beautifully.
– Ketchup: A timeless favorite that adds a hint of sweetness.
– Spicy Aioli: For those who enjoy a kick, a spicy aioli with garlic and sriracha can be a fantastic addition.
Presentation Tips
Presentation matters when serving onion rings. Consider arranging them in a rustic basket lined with parchment paper for a casual, inviting look. You might also garnish the dish with fresh herbs, such as parsley or chives, to add a pop of color.
Nutritional Insights
While onion rings are undoubtedly a tasty treat, it’s essential to be mindful of their nutritional aspects. A typical serving of onion rings can be high in calories, fat, and carbohydrates, primarily depending on the frying method and portion size.
Portion Sizes
Consider serving onion rings as an appetizer or side dish rather than the main course. This approach allows you to enjoy their crunch without overindulging.
Healthier Alternatives
If you’re looking for healthier alternatives, consider baking the onion rings instead of frying. You can achieve a crispy texture by using a convection oven or air fryer, which requires less oil. Additionally, using whole-grain breadcrumbs can add fiber and nutrients to your dish.
Conclusion
Homemade crispy golden onion rings are a delightful snack or side dish that can elevate any meal. The process of making them—from setting up your breading station to frying them to golden perfection—offers a satisfying culinary experience. With the right techniques, you can create onion rings that are not only crunchy and flavorful but also a joy to share with friends and family.
Embrace the process, savor the flavors, and enjoy the satisfaction of cooking these delicious snacks at home. Whether served at a barbecue, with burgers, or as a standalone treat, crispy onion rings are sure to be a hit. So gather your ingredients, follow the steps, and indulge in the crispy goodness of freshly made onion rings!