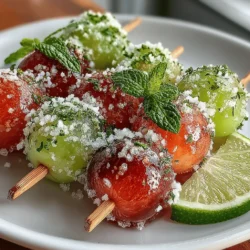
Chilled Bliss: Frozen Grape Skewers with Lime
In recent years, the trend of healthy snacking has surged, as more people are becoming conscious of their dietary choices. With a growing emphasis on wholesome ingredients, snacks that are both nutritious and delicious are in high demand. One such delightful treat that perfectly fits this category is frozen grape skewers with lime. This refreshing snack not only satisfies your sweet tooth but also packs a nutritional punch, making it an ideal choice for both kids and adults alike.
Frozen grape skewers are incredibly easy to make, requiring minimal preparation and just a few ingredients. They serve as a perfect addition to summer gatherings, picnics, or even as a quick refreshment during hot days. The natural sweetness of grapes, combined with the zesty brightness of lime, creates a flavor profile that is both invigorating and satisfying. Not only are these skewers a fun and visually appealing snack, but they also offer numerous health benefits thanks to the star ingredients: grapes and lime.
Understanding the Ingredients
Seedless Grapes: Nature’s Candy
At the heart of this recipe are seedless grapes, which are not only convenient to eat but also a powerhouse of health benefits. Grapes are rich in antioxidants, particularly resveratrol, which is known for its anti-inflammatory properties and potential to promote heart health. They also contain essential vitamins such as vitamin C and K, along with minerals like potassium. The high water content in grapes makes them a hydrating choice, especially during warmer months.
When it comes to flavor and appearance, grapes offer a delightful variety. Green grapes tend to be slightly tart and crisp, while red grapes are sweeter and more robust in flavor. This variation allows you to customize your frozen grape skewers according to your taste preferences or to create a colorful presentation.
The Zest of Lime
The addition of lime not only elevates the taste of the frozen grape skewers but also provides a boost of nutritional benefits. Limes are packed with vitamin C, which is vital for a healthy immune system and skin. They are also rich in antioxidants that help combat oxidative stress in the body. The acidity of lime adds a refreshing tang that balances the sweetness of the grapes, making each bite a burst of flavor.
Natural Sweeteners: Honey or Agave Syrup
To enhance the sweetness of the skewers, you may choose to incorporate a drizzle of honey or agave syrup. These natural sweeteners are excellent alternatives to refined sugar, offering additional nutrients and a lower glycemic index. Honey is known for its antimicrobial properties and potential digestive benefits, while agave syrup is a vegan-friendly option that is sweeter than honey, allowing you to use less.
When using these sweeteners, it’s essential to adjust the amount according to your taste preference. Start with a small amount and increase as needed, keeping in mind that the natural sweetness of the grapes may suffice on its own.
The Flavor Enhancer: Sea Salt
A pinch of sea salt can transform the flavor profile of your frozen grape skewers, enhancing the natural sweetness of the grapes while adding depth to the overall taste. Unlike table salt, which is heavily processed and often contains additives, sea salt retains essential minerals that can contribute to a more complex flavor. The slight crunch of sea salt against the juicy grapes creates a satisfying contrast that elevates the entire snacking experience.
Fresh Mint: A Garnish with Benefits
To finish off your frozen grape skewers, consider using fresh mint leaves as a garnish. Not only does mint add a pop of color and a fresh aroma, but it also introduces a cooling element that complements the chilled grapes. Mint has its own health benefits, including aiding digestion and providing anti-inflammatory properties. The visual appeal and flavor addition of mint make it a perfect finishing touch to your skewers.
Step-by-Step Guide to Making Frozen Grape Skewers
Preparing the Grapes for the Skewers
Before diving into the fun of assembling your frozen grape skewers, it’s crucial to prepare the grapes properly. Start by selecting fresh, ripe seedless grapes. Whether you choose green, red, or a mix of both, ensure they are firm and plump for the best texture and flavor.
The first step in preparing your grapes is washing them thoroughly. Place the grapes in a colander and rinse under cool running water to remove any dirt or pesticides. After washing, gently pat them dry with a clean kitchen towel or paper towels. It’s essential to dry the grapes well, as excess moisture can lead to ice crystals forming when they are frozen.
Once the grapes are clean and dry, the next task is to remove them from their stems. Using your fingers, gently pinch the grapes at the stem to detach them without bruising or damaging the fruit. This step is crucial, as intact grapes will freeze better and maintain their shape on the skewers.
Creating the Lime Mixture
To bring the skewers to life, you’ll want to create a lime mixture that will coat your grapes before freezing. Start by zesting one or two limes to capture the fragrant oils in the peel, which will enhance the lime flavor in your skewers. After zesting, cut the limes in half and squeeze out the juice into a small bowl. Be sure to remove any seeds that may have fallen in.
Next, combine the lime juice and zest with your choice of sweetener—whether honey or agave syrup. Mix well until the sweetener is fully dissolved. You can add a pinch of sea salt to the mixture to amplify the flavors further.
Once your lime mixture is ready, you can gently toss the prepared grapes in this zesty concoction, ensuring that each grape is evenly coated. This not only infuses the grapes with flavor but also prepares them for the freezing process, enhancing their taste once they’re served.
By following these initial steps, you’re well on your way to creating a delightful and refreshing treat that will impress anyone who tries it. The combination of sweet grapes, tangy lime, and a hint of sea salt promises a unique snacking experience that embodies the spirit of healthy, fun eating. Stay tuned for the next part of this article, where we will explore the assembly of the skewers and the freezing process, ensuring you can enjoy your Chilled Bliss in no time.
{{image_2}}
Detailed Instructions for Zesting and Juicing Lime
Zesting and juicing lime is a straightforward process that adds a refreshing zing to your frozen grape skewers. To zest the lime, use a microplane or a fine grater. Gently rub the lime against the grater, taking care to avoid the bitter white pith beneath the skin. Aim for just the green outer layer, which is packed with flavor. You will need about one teaspoon of lime zest for this recipe.
Next, to juice the lime, cut it in half and use a manual juicer or squeeze it by hand. If you’re using your hands, press the lime half against your palm while twisting to extract the juice efficiently. Strain the juice through a fine mesh sieve to catch any seeds or pulp. You’ll want approximately two tablespoons of freshly squeezed lime juice to balance the sweetness of the grapes and honey or agave.
Importance of Mixing Honey/Agave Properly
Once you have your lime juice and zest prepared, it’s essential to mix the honey or agave syrup thoroughly with the lime juice. This step ensures even distribution of sweetness throughout the skewers. Use a whisk or a fork to blend the two ingredients until they are fully combined. This mixture will act as a marinade for the grapes, enhancing their flavor and making every bite a delightful experience.
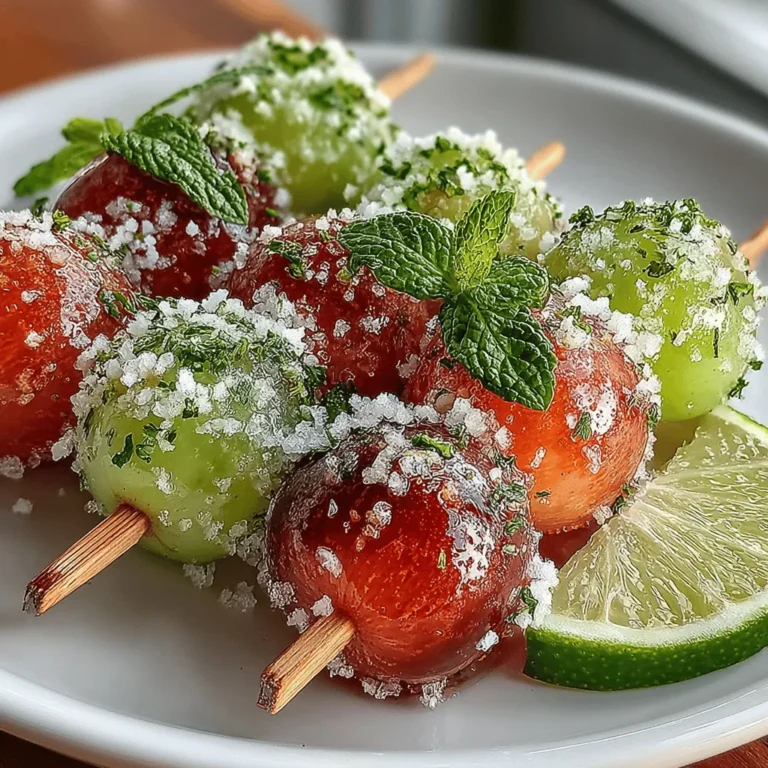
Assembling the Grape Skewers
Now that your lime mixture is ready, it’s time to assemble your grape skewers. Start by rinsing the grapes under cold water to remove any dirt or pesticides. Pat them dry with a clean kitchen towel. Choose a mix of green and red grapes for a vibrant appearance.
Techniques for Threading Grapes onto Skewers
To create the skewers, carefully thread each grape onto the wooden or metal skewers. If you’re using wooden skewers, consider soaking them in water for about 30 minutes beforehand. This will prevent them from burning if you decide to grill them later or simply keep them from splintering while threading the grapes.
When threading, leave a little space between each grape. This spacing allows the lime marinade to coat each grape evenly and will make for a beautiful presentation. Aim for about 5-6 grapes per skewer, but feel free to adjust this based on the size of your grapes or personal preference.
Suggestions for Presentation
The presentation of your frozen grape skewers is just as important as their flavor. For an eye-catching display, arrange the skewers in a rainbow pattern, alternating between green and red grapes. You can also create a gradient effect by grouping similar colors together.
Use a decorative platter or a tall glass to serve the skewers upright. This method not only showcases the skewers beautifully but also makes them easy to grab and enjoy. For an extra touch, sprinkle some lime zest over the top of the skewers before serving to enhance their visual appeal.
Marinating Process
Once assembled, it’s time to marinate the grape skewers in the lime-honey mixture. Place the skewers in a shallow dish and pour the lime mixture over them, ensuring each grape is well coated. Cover the dish with plastic wrap or a lid and let it marinate in the refrigerator for at least 30 minutes.
Explanation of How Marinating Enhances Flavor
Marinating is a crucial step that allows the grapes to absorb the citrusy sweetness of the lime and honey. The acidity of the lime juice helps to break down the grape’s surface, making them more receptive to flavor absorption. This process enhances the overall taste of the skewers, transforming them from simple grapes into a gourmet treat.
Optimal Time for Marination and Why It Matters
For best results, aim for at least 30 minutes of marination, but you can let them sit for up to two hours. The longer the grapes marinate, the more flavor they will absorb. However, avoid marinating for too long to prevent the grapes from becoming overly soft.
Freezing the Skewers
After marinating, it’s time to freeze your grape skewers. Lay them flat on a baking sheet lined with parchment paper, ensuring that they are spaced apart to prevent sticking. Freezing them on a flat surface helps maintain their shape and makes it easier to remove them later.
Best Practices for Freezing to Prevent Sticking and Ensure Even Freezing
To prevent the skewers from sticking together, avoid overcrowding the baking sheet. Place them in a single layer and ensure there is enough space between each skewer. Once they are arranged, place the baking sheet in the freezer for about 2-3 hours or until the grapes are completely frozen.
Importance of Using Parchment Paper for Easy Removal
Using parchment paper is essential for easy removal of the frozen skewers. It provides a non-stick surface that allows you to lift the skewers off the baking sheet without any hassle. Once frozen, you can transfer the skewers to a zip-top bag or airtight container for longer storage.
Serving Suggestions and Presentation Ideas
Frozen grape skewers are incredibly versatile and perfect for various occasions. They make an excellent treat for summer parties, picnics, and casual gatherings. Here are some creative presentation tips to elevate your serving game:
– Platter Display: Arrange the skewers on a large platter, garnished with fresh mint leaves or additional lime wedges for a pop of color.
– Fruit Cups: Serve the skewers in individual cups alongside other fresh fruits, creating a refreshing fruit salad experience.
– Dip Pairing: Consider offering a yogurt or chocolate dip on the side for those who enjoy a little extra indulgence.
Ideal Occasions for Serving Frozen Grape Skewers
These frozen treats are perfect for hot summer days, family picnics, or as a fun dessert option for birthday parties. Their refreshing nature and colorful appearance are sure to impress guests of all ages.
Creative Presentation Tips
To further enhance their appeal, you can drizzle some melted chocolate over the frozen skewers or sprinkle chopped nuts and coconut flakes for added texture. Creativity in presentation not only makes the dish more tantalizing but also elevates the overall experience.
Health Benefits of Frozen Grape Skewers
The combination of grapes and lime not only provides a refreshing taste but also offers numerous health benefits:
– Low-Calorie Snack Option: Compared to traditional desserts, these frozen grape skewers are a guilt-free indulgence, making them an excellent choice for health-conscious individuals.
– Hydrating Properties: Grapes have a high water content, which helps keep you hydrated, especially during hot weather.
– Refreshing Qualities of Lime: The acidity and flavor of lime add not only zest but also vitamin C, which boosts your immune system.
– Ideal Post-Workout Snack: The natural sugars in grapes provide a quick energy boost, making them an ideal snack after your workout or physical activities.
Conclusion
Making frozen grape skewers with lime is not only easy but also offers a delightful and healthy option for your summer menus. With simple ingredients, you can create a fun and refreshing treat that everyone will love. The combination of sweet grapes and zesty lime creates a flavor explosion that is hard to resist.
Incorporate this recipe into your gatherings for a unique twist on traditional snacks. You’ll find that these frozen grape skewers are not only enjoyable but also nutritious, providing a perfect balance of sweetness and refreshment. Embrace the simplicity of this recipe, and let it inspire you to create more delightful snacks that are both enjoyable and good for you.