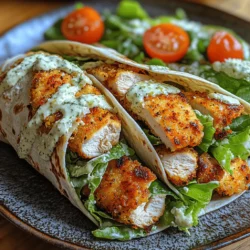
Crispy Chicken Caesar Wraps: A Flavorful Twist on a Classic Dish
Wraps have surged in popularity over the past few decades, becoming a go-to meal option for those seeking a quick yet satisfying bite. Their versatility allows for countless combinations of ingredients, making them a favorite among busy professionals, students, and families alike. From breakfast wraps to hearty dinners, the possibilities are virtually endless. Today, we’re focusing on a delightful variant: Crispy Chicken Caesar Wraps. This recipe perfectly combines the classic flavors of a Caesar salad with the satisfying crunch of crispy chicken, enveloped in a soft tortilla for a meal that is as delicious as it is convenient.
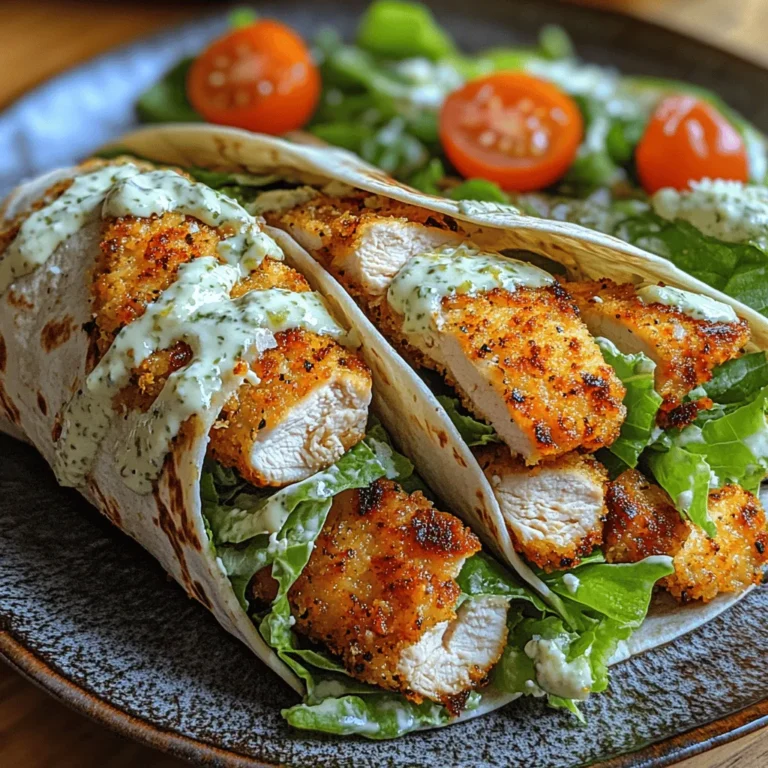
Crispy Chicken Caesar Wraps embody a harmonious blend of textures and flavors. The star of the show is, of course, the crispy chicken—golden and crunchy on the outside while remaining juicy and tender on the inside. Paired with the freshness of romaine lettuce and the rich creaminess of Caesar dressing, each bite delivers an explosion of taste that is truly irresistible. Whether you’re looking for a quick lunch or a light dinner option, these wraps are sure to impress.
Understanding the Ingredients
To create the perfect Crispy Chicken Caesar Wraps, it’s essential to understand the role of each ingredient, as well as their nutritional benefits. Let’s delve into the key components that make this recipe so special.
Boneless, Skinless Chicken Breasts
At the heart of our wraps are boneless, skinless chicken breasts. This lean protein is an excellent choice for those looking to maintain a healthy diet while enjoying a satisfying meal. Chicken breasts are rich in protein and low in fat, making them a great option for muscle repair and growth. When selecting chicken, opt for high-quality, organic options when possible, as they tend to have better flavor and texture. The preparation of the chicken is critical; seasoning is key to enhancing its natural flavor.
Panko Bread Crumbs
One of the secrets to achieving that coveted crunch in our Crispy Chicken Caesar Wraps is the use of panko bread crumbs. Unlike traditional breadcrumbs, panko is made from crustless bread that has been processed into larger flakes, resulting in a lighter and airier texture. This unique structure allows for a superior crunch when baked or fried, making your chicken extra crispy without becoming overly greasy. It’s the perfect companion to our juicy chicken, ensuring each bite has that satisfying crunch.
All-Purpose Flour
All-purpose flour plays a crucial role in the breading process. It acts as the initial coating for our chicken, allowing the egg and panko to adhere effectively. This step is essential in creating a smooth layer that will hold the crispy coating in place. The flour not only aids in the breading but also contributes to the overall texture of the finished product.
Eggs
Eggs serve as the binder in our breading station. When beaten and applied to the floured chicken, they create a sticky surface that helps the panko adhere during cooking. Eggs are not just a binding agent; they also add moisture and richness to the chicken, enhancing its flavor and texture.
Romaine Lettuce
No Caesar wrap is complete without the crisp freshness of romaine lettuce. This leafy green is not only a staple in Caesar salads but also provides a crunchy contrast to the crispy chicken. Romaine is loaded with vitamins A and K and is a great source of fiber, making it a nutritious addition to our wraps. Its sturdy leaves hold up well against the creamy dressing and crispy chicken, ensuring a satisfying bite every time.
Caesar Dressing and Parmesan Cheese
The flavors of Caesar dressing are what truly elevate the wrap. Traditionally made from garlic, anchovies, lemon juice, and egg yolk, Caesar dressing brings a creamy, tangy flavor that complements the chicken beautifully. For those who prefer a vegetarian option, there are numerous variations available that exclude anchovies but still provide that characteristic Caesar taste.
Parmesan cheese, with its nutty and salty notes, adds depth to the flavor profile. Whether you choose to sprinkle it on top or mix it into the dressing, this cheese enhances the overall richness of the wraps.
Optional Ingredients: Cherry Tomatoes
While not a traditional ingredient in a Caesar wrap, cherry tomatoes can add a burst of freshness and color. These small, sweet tomatoes provide a delightful contrast to the savory flavors of the chicken and dressing. They are also packed with antioxidants and vitamins, making them a nutritious addition to your meal.
Preparation Steps
Now that we have a clear understanding of our ingredients, it’s time to dive into the preparation process for our Crispy Chicken Caesar Wraps. A well-organized kitchen makes for an efficient cooking experience, so let’s set up our breading station first.
Preparing the Chicken
The first step in crafting these wraps is preparing the chicken. Start by slicing your boneless, skinless chicken breasts into thin cutlets. This not only helps them cook more evenly but also allows for a greater surface area to achieve that crispy texture. Before breading, it’s crucial to season the chicken generously with salt and pepper. This simple step enhances the natural flavor of the chicken and sets the stage for a delicious wrap.
Next, set up your breading station. In one bowl, place the all-purpose flour, seasoned with a pinch of salt and pepper. In a second bowl, beat a couple of eggs until smooth. In a third bowl, pour in the panko bread crumbs. This assembly line will streamline the breading process and ensure an even coating on each piece of chicken.
Begin by dredging a chicken cutlet in the flour, ensuring it is fully coated. Shake off any excess flour before dipping it into the egg wash, allowing any surplus to drip off. Finally, press the chicken into the panko bread crumbs, making sure to cover it entirely for that signature crunch. Repeat this process for each cutlet and set them aside on a plate or wire rack while you heat your cooking oil.
By following these initial steps, you’ll be well on your way to creating Crispy Chicken Caesar Wraps that are sure to be a hit at your next meal. The combination of flavors and textures is not only satisfying but also nutritious—a perfect balance for any lunch or light dinner. In the next section of this article, we’ll explore how to cook the chicken to perfection and assemble the wraps for a delightful dining experience.
{{image_2}}
Baking the Chicken
To achieve that perfect, crispy texture for your chicken, the baking process is crucial. Preheat your oven to 425°F (220°C). This higher temperature not only helps to render out the fat in the chicken skin but also promotes browning, resulting in a deliciously crispy exterior. A good rule of thumb is to bake the chicken for about 20-25 minutes, but this can vary based on the size and thickness of your chicken pieces.
Importance of the Baking Temperature and Time for Achieving Golden-Brown, Crispy Chicken
Baking at the right temperature is essential for achieving a golden-brown finish. If your oven is too cool, the chicken will cook too slowly, leading to a soggy texture. Conversely, if it’s too hot, you risk burning the outside before the inside is properly cooked. As a general guideline, chicken should reach an internal temperature of 165°F (75°C) to ensure it is safely cooked. Using a meat thermometer can help you avoid any guesswork and ensure your chicken is both safe to eat and perfectly cooked.
Mixing the Caesar Filling
Once your chicken is baking, it’s time to prepare the Caesar filling. This is where the magic happens, as the flavors meld together to create that signature Caesar taste.
Combining Flavors: How to Achieve a Well-Balanced Caesar Salad Mixture
Start with fresh romaine lettuce, roughly chopped for easy wrapping. Combine this with grated Parmesan cheese and croutons for that classic crunch. The key to a great Caesar filling is the dressing. A traditional Caesar dressing is creamy and tangy, providing a delightful contrast to the crispy chicken.
Tips for Choosing Caesar Dressing and Variations Based on Dietary Preferences
When selecting Caesar dressing, consider using a store-bought version for convenience, but look for one that uses high-quality ingredients without added preservatives. If you prefer homemade, a simple mix of mayonnaise, lemon juice, garlic, and anchovy paste can create a fantastic flavor. For those with dietary restrictions, vegan Caesar dressings are also readily available, made with plant-based ingredients that maintain the creamy texture without the use of dairy or eggs.
Assembling the Wraps
Now that you have your crispy chicken and Caesar filling ready, it’s time to assemble the wraps. This step is straightforward but crucial for ensuring that each bite is flavorful and satisfying.
Step-by-Step Guide to Assembling the Wraps
1. Lay Out the Tortilla: Start with a large tortilla; flour tortillas work best for this recipe due to their flexibility. Place it flat on a clean surface.
2. Add the Caesar Filling: Begin by laying down a generous handful of the Caesar salad mixture in the center of the tortilla. Be careful not to overfill, as this can make wrapping difficult.
3. Layer the Chicken: Next, slice your baked chicken into strips and layer them on top of the salad mixture. This ensures that the chicken is evenly distributed throughout the wrap.
4. Wrap It Up: Fold the sides of the tortilla inward over the filling, then roll it from the bottom up tightly to enclose the filling completely. This technique helps prevent spillage and ensures a tight closure.
Techniques for Wrapping to Prevent Spillage and Ensure a Tight Closure
When wrapping, make sure to hold the filling in place while tucking in the sides. Use your fingers to pinch the sides in as you roll, creating a secure seal. If you have trouble keeping the wrap closed, you can use a toothpick to hold it together or wrap it in parchment paper for serving.
Presentation Ideas
Presentation can elevate your meal from ordinary to extraordinary. Here are some tips to make your Crispy Chicken Caesar Wraps visually appealing:
1. Platter Arrangement: Arrange the wraps on a large serving platter, either whole or sliced in half to showcase the colorful filling.
2. Garnishing: Consider garnishing the platter with extra Parmesan cheese, lemon wedges, or sprigs of fresh parsley. Not only does this enhance the visual appeal, but it also adds a pop of flavor.
3. Accompaniments: Serve with a small bowl of Caesar dressing on the side for dipping, or provide a light drizzle on top of the wraps for added flavor.
Nutritional Information and Serving Suggestions
Crispy Chicken Caesar Wraps are not just delicious; they also pack a nutritional punch. Here’s a breakdown of what you can expect in terms of nutritional value:
– Protein Content: Each wrap typically contains around 25-30 grams of protein, making it a filling meal option.
– Calories: Depending on the size and ingredients, each wrap can have approximately 400-500 calories.
– Vitamins: The fresh romaine lettuce provides essential vitamins A and C, while the chicken contributes iron and B vitamins.
Suggested Sides That Complement the Wraps
To create a well-rounded meal, consider serving your wraps with fresh vegetable sticks, such as carrots and cucumbers, or a light soup like a tomato basil bisque. A side of fruit salad can also add a refreshing touch to your meal.
Conclusion
Crispy Chicken Caesar Wraps are not only a tasty choice but also a healthier alternative to traditional fast food. They combine the savory crunch of baked chicken with the refreshing zest of a classic Caesar salad, all wrapped up in a convenient tortilla. These wraps are perfect for lunches, picnics, or even a quick dinner at home. The best part is their versatility; you can easily customize them to fit any occasion or dietary preference. Enjoy these wraps as a delicious meal option that is simple to prepare and bursting with flavor.


